I came across Virtualbox a little while ago while futzing around in the internet tubes. However, at that time the virtualbox for OS X hosts was still beta2. With no real necessity for me to run Windows on Mac at that time, I decided to wait for the final version. As a part of my research, I now need to use a particular Windows program. So, before I shell out $$ for a copy of Fusion or Parallels, I decided to check up on Virtualbox.
Virtualbox for Mac OS X hosts (beta4) is now available for download here (~21MB disk image file). Once downloaded, in order to install, double click on the file to mount the image and simply drag the Vitrualbox app into the Applications folder. In order to run Windows on Mac, fire up the app and click on the 'New' button on the top left corner to create a new virtual machine. A wizard will guide you through the installation process.

Click 'Next'.

Give a name to your virtual machine. Since, I was going to install Windows, I named it so. Then, pick the 'OS Type' from the list and click 'Next' to continue.

You need to choose how much memory you would like to allocate for Windows. Whatever amount you choose here, that much amount of memory would be unavailable for other OS X apps when the virtual machine is running. If your computer is low on memory to start with, you should not allocate a lot of it to the virtual machine here. 192MB for Windows is a good bet; but I chose 512 in this particular case.

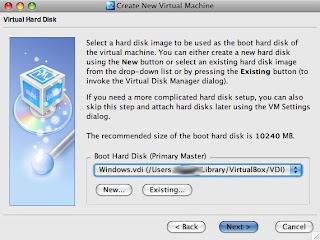
You now have to allocate hard drive space for Windows. If this is the first time you are using Virtual Box, it is very likely that you do not have a hard disk image already. So, you have to click on the 'New' button to create a new one.

A new window appears that will guide you through the steps to create a new hard drive image. Click 'Next' on the new window to continue.

There are two types of virtual disk images: one that dynamically expands and one that is of fixed size. You can pick any kind; in this case I picked one of fixed size.

A filename for your virtual disk image is automatically entered - it is same as the name of your virtual machine. For size, I allocated 10GB for Windows. If you think that you would need more space for files in your Windows partition, you should increase the size here. However, you should keep in mind that the hard drive space you allocate here would be immediately deducted from your total hard drive space on the Mac. So, if you are running short on your Mac hard drive space, you should stick to the minimum. Also, if you are not sure how much hard drive space you want to allocate for windows, go back and pick the dynamic kind of disk image. Once you are done, click 'Next' to continue.

Click 'Finish'. The setup will now start creating a virtual disk image. A little window with a progress bar will appear. It takes a few minutes to create the disk image. So, be patient.

Once the disk image is made, you would go back to the previous window - now with the boot hard drive selected.

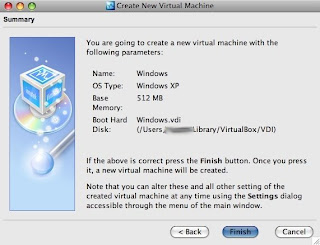
Click 'Next' to continue and then 'Finish' to finish creating a virtual machine.

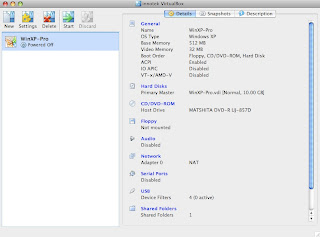
Once the virtual machine is created, you should see it in the main Virtualbox app window like this:

The default settings for a virtual machine should be okay. However, if you are a little adventurous and would like to tweak the settings of your virtual machine, you can do so by clicking the 'Settings' button.
Now, insert a Windows installation disc, select your virtual machine and hit 'Start'. You would see a new window of virtual machine and it boots from the Windows installation disc. Follow on screen directions to install Windows. Once, you are finished with installing Windows, you need to install 'Virtualbox Guest Additions'. In order to do so, Device > Install Guest Additions. Follow on screen directions to install Virtualbox guest additions. You would have to restart the virtual machine after installation.
That's it! Enjoy(?) Windows on your Mac.


No comments:
Post a Comment